The Dashboard allows you to display an embedded site analytics dashboard (e.g. analytics report) from an external analytics provider directly in the dotCMS back-end. The Dashboard will work with any analytics provider that allows you to create an embedded dashboard. This document includes an example of using Google Analytics with an embedded dashboard link created in Google Data Studio.
Permissions and Settings
Since the embedded Dashboard displays an embedded screen from another web site, you dotCMS users must have access to the appropriate analytics site and assets for them to be able to view the analytics report in the dotCMS Dashboard. This means:
- If your analytics report is only viewable by authenticated users, then your dotCMS users must also be authenticated on the analytics site for them to view the analytics report in dotCMS.
- So if you are not using a single-sign-in provider (e.g. Oauth) with dotCMS, and you do not set up a shareable link, your users may need to login to two separate accounts for the dashboard to display properly.
- If your analytics provider uses cookies when displaying the report, your users' browser settings must allow access to 3rd party cookies or the analytics report will not display properly within dotCMS.
Example: Google Analytics
To embed a Google Analytics dashboard into the dotCMS Dashboard, you must create a dashboard using Google Data Studio. This example uses a sample report provided by Google Data Studio, but it is recommended that you create your own custom report; for more information on how to create and edit Google Studio reports, please see the Google Data Studio site.
Step 1: Log into Google Data Studio
Note: If you create a standard (non-shared) embedded report, the Google account you use to login to the Google Data Studio is the account that you must also login to in order to be able to view the report data in the dotCMS back-end.
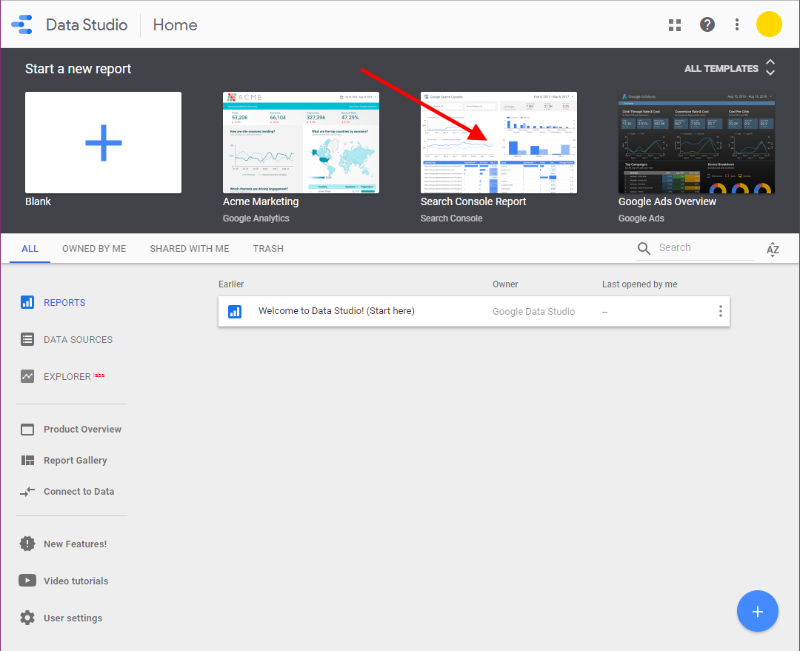
Step 2: Start a new report
Select the Search Console Report.
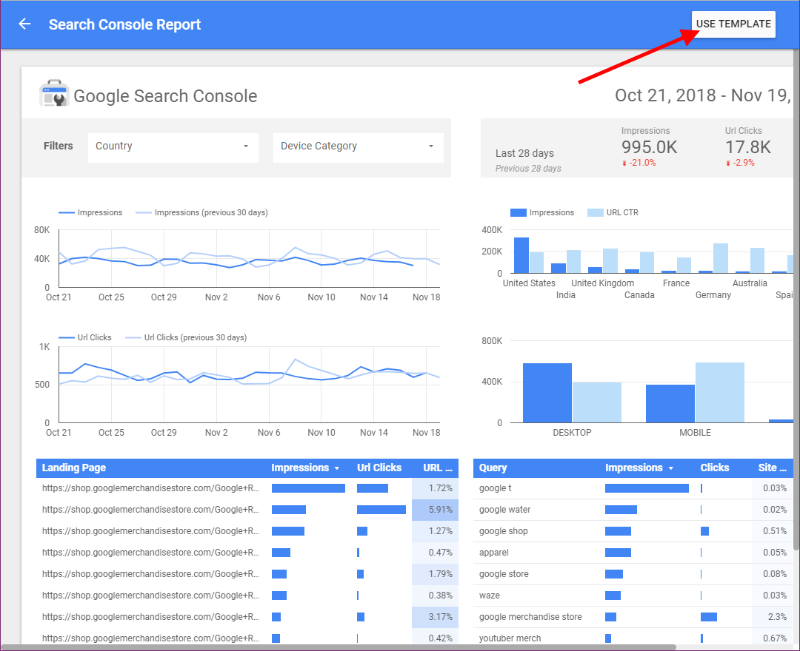
Step 3: Select the template
Click the Use Template button.
Note: If you have not previously used Google Data Studio, you will be prompted to agree to the Terms of use and to set your preferences before proceeding.
Step 4: Select your data sources
Click the Create a New Data Source link.
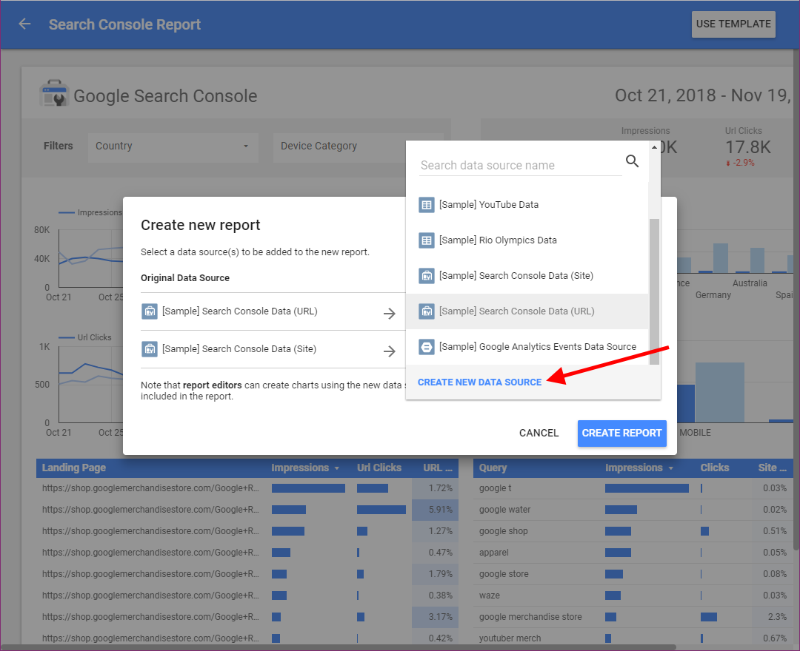
Select the Google Analytics data provider.

Note: If you have not previously used Google Data Studio, you will be prompted to authorize Google Data Studio to access your Google Analytics data.
Step 5: Edit the fields in your data source
You may disable any fields you do not want to include. Note, however, that the report will only use the fields it is configured to use, so there is no need to disable any fields unless they are included in the report template and you do not want them to display in the report.
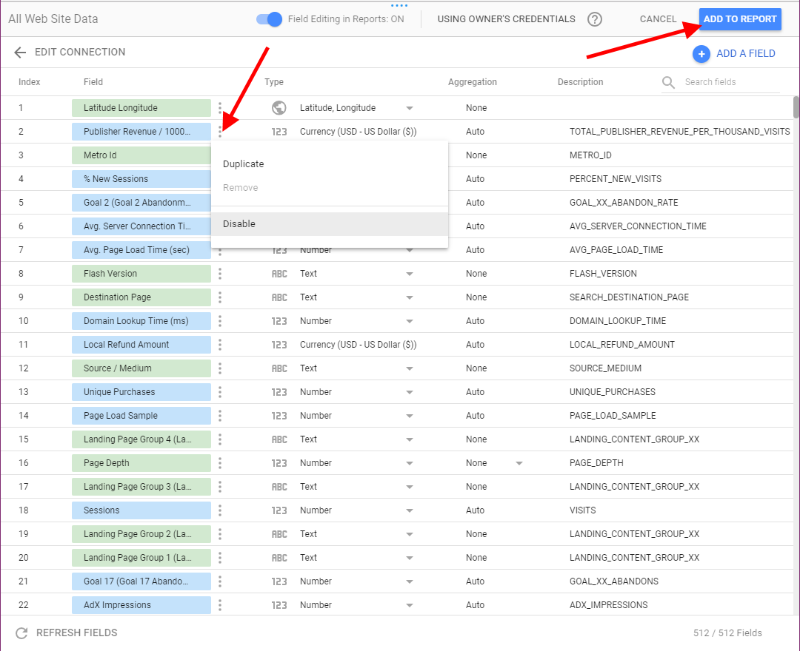
When you are done editing the fields in the data source, select “ADD TO REPORT”.
Note: If you have not previously used Google Data Studio, you will be prompted to authorize Google Data Studio to access your Google Drive to save the report.
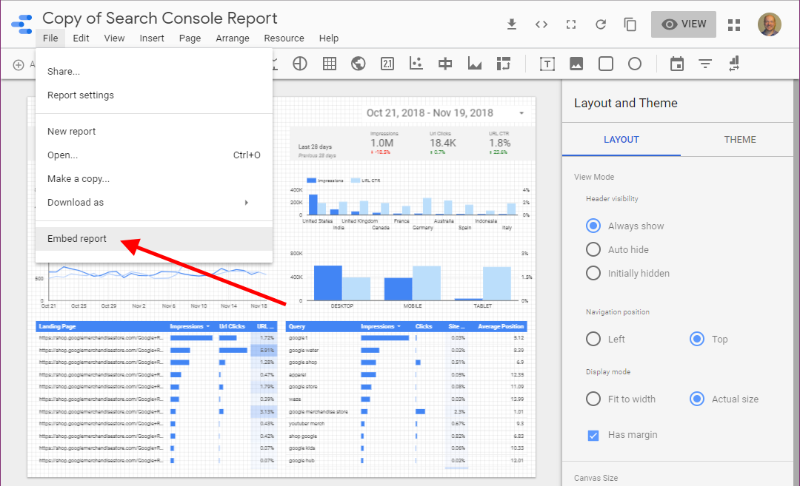
Step 6: Create a link to embed or share the report
There are two ways you can share the report so it can be displayed in the dotCMS back-end - either as an embedded link (which is accessible only to authorized users) or as a shared link (which is accessible to anyone who has the link).
Embedded Link
Using an embedded link ensures that only authorized users can access your Google Analytics report, but requires users to login to Google to be able to see the report. (Note that if you use the Oauth plugin to authorize users, no additional login is needed).
If you create the report as an embedded link, then for any user to be able to see the report in the dotCMS back-end Dashboard:
- You must give their Google account access to view the report through Google Data Studio, and
- The user must login to their Google account in the same browser session where they are logged into the dotCMS back-end.
To create an embedded link in Google Data Studio:
- Open the Google Data Studio report editor.
- Select File -> Embed report.
- Check the box to Enable embedding.
- Select the *Embed URL radio button.
- Click the COPY TO CLIPBOARD button.


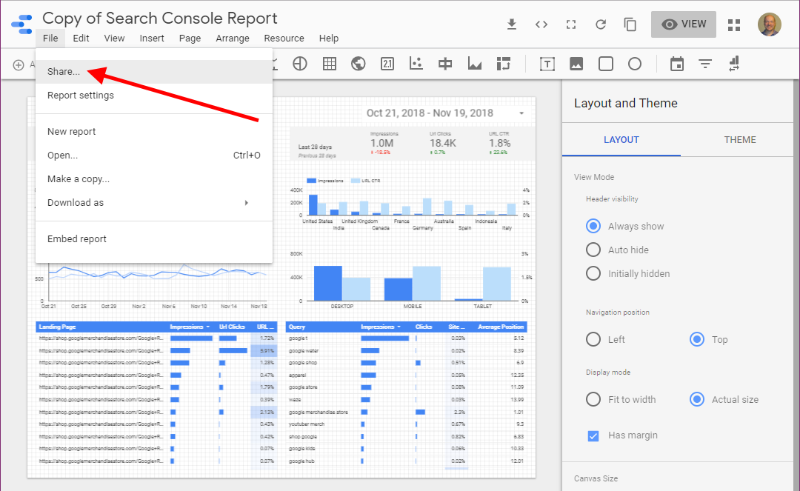
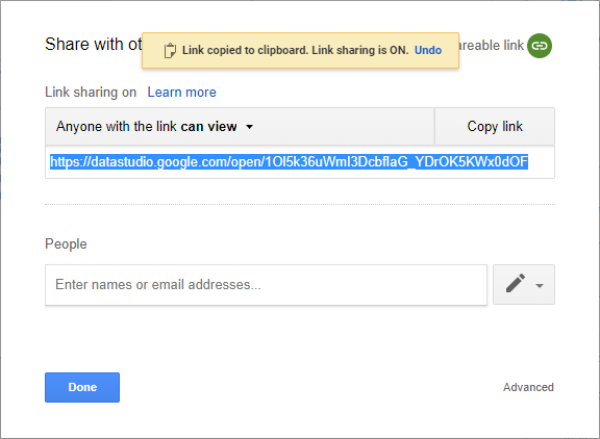
Shareable Link
Using a shared link allows you to enable users to display the report (including all your analytics data) without having to first log into a Google account. This makes the report easier to access for users who may not have access to your Google Analytics account, but provides less security than an embedded link since anyone who gets access to the report URL will be able to view the report without any authentication.
To create a shared link in Google Data Studio:
- Open the Google Data Studio report editor.
- Select File -> Share….
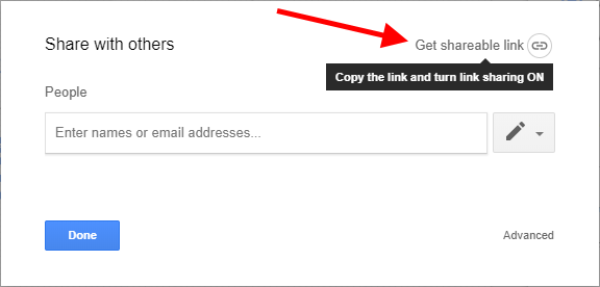
- Click Get shareable link.
- Click the Copy Link button.
Note:
- Instead of allowing anyone with the link to view the report, you may choose to restrict access to the link to only specific Google accounts you specify. To do this, you must both:
- Turn off the shareable link, and
- Specify the Google email addresses of all users you wish to give access to the report.
- If you create this kind of a shareable link, users who have access to the link must still login to their Google accounts, as they would if you created an embedded link.
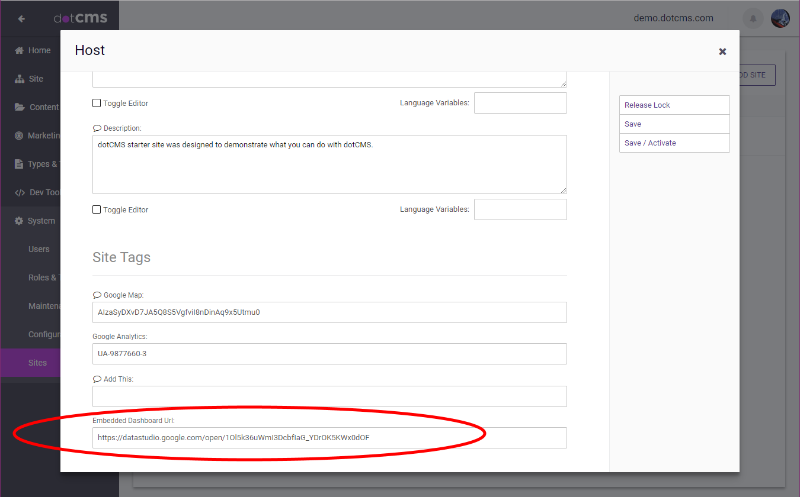
Step 7: Save the report URL to your dotCMS Site
- In the dotCMS back-end, select System -> Sites.
- Select your site from the list.
- Paste the embedded dashboard URL into the Embedded Dashboard URL field.
- Save/Activate the Site.
Important: Customers Upgrading from Older Versions
If you have upgraded your dotCMS site from a version of dotCMS prior to dotCMS 5.0, your Host Content Type will not have an Embedded Dashboard URL field. You must add a Text field to the Host Content Type with the variable name embeddedDashboard. It is recommended that you name this field “Embedded Dashboard” when it is first created, and then you rename the field to “Embedded Dashboard URL”.
Legacy Dashboard
In previous versions of dotCMS, an integrated Dashboard was provided which displayed limited tracking information about your dotCMS Sites. This legacy Dashboard is now deprecated, since it provides very limited information and flexibility compared to modern analytics tools. The legacy Dashboard Tool is still included with dotCMS for backward compatibility, named Dashboard (Legacy), but may be removed in a future version of dotCMS.