You can create your own OSGi plugin in dotCMS using Eclipse. This document provides links to examples, and detailed instructions to enable debugging of your plugin in dotCMS, configure the Eclipse development environment, create your plugin, and install and uninstall your plugin.
Note If you're new to developing plugins in dotCMS, we strongly recommend that you begin with the OSGi plugin examples provided with the dotCMS distribution before adding or making changes to plugin code.
Example Plugins
We provide several examples to help create new dynamic plugins. If you are new to plugin development in dotCMS, we recommend that you begin by creating one of the example plugins, without changes, to ensure your development environment is configured properly before adding your own code or making changes to the example code. Once you've successfully built and deployed one of the example plugins, deploying your own custom plugin is very straight forward.
The following examples are provided:
| Example | Description |
|---|---|
| com.dotcms.3rd.party | Import 3rd Party Libraries. |
| com.dotcms.fragment | Create an OSGi Fragment (export packages to other OSGi plugins). |
| com.dotcms.service | Add a simple service class that can be used as a proxy by other plugins. |
| com.dotcms.servlet | Use services provided by other plugins and register servlets and filters. |
| com.dotcms.override | Override a dotCMS class. |
| com.dotcms.hooks | Add a Content Hook class. |
| com.dotcms.tuckey | Add Tuckey rewrite rules. |
| com.dotcms.job | Schedule Quartz Jobs. |
| com.dotcms.portlet | Create a custom admin tool. |
| com.dotcms.viewtool | Create a custom Velocity viewtool. |
| com.dotcms.actionlet | Create a new Workflow Actionlet. |
| com.dotcms.ruleengine.conditionlet | Create a new Rule Condition. |
| com.dotcms.ruleengine.actionlet | Create a new Rule Action. |
Source code for examples can be found in our plugin-seeds repository on GitHub.
Running dotCMS in Debug Mode
Before deploying an OSGi plugin, it is important to run your dotCMS development environment in debug mode so that you can add breakpoints to your code in Eclipse to step through your custom plugin code. To start dotCMS in debug mode, run the following startup command from the root of the dotCMS installation folder to add the debug parameter:
- Linux/OS-X/Unix:
./bin/startup.sh debug
- Windows:
bin\startup.bat debug
Note:
- Running in debug mode consumes significant server resources.
- Make sure that once you have finished testing your OSGi plugin, you stop your dotCMS instance and restart your dotCMS instance WITHOUT the debug command.
- If you are running dotCMS in an application server other than Tomcat, you will need to change the above command to reference the appropriate log file for your application server.
- You may also wish to “tail” the log file so you can view the debug messages as they are generated.
- In Linux, OS-X and Unix, this can be accomplished by running the following command:
`tail -f dotserver/tomcat-8.0.18/logs/catalina.out` - In Windows, you will need to use a third-party application (such as BareTail) to tail the log file.
- In Linux, OS-X and Unix, this can be accomplished by running the following command:
Set up your Plugin Development Environment in Eclipse
To create a new plugin, you must create a new project in Eclipse with the same folder organization as provided in one of our OSGi plugin examples found in the /docs/examples/osgi/ folder.
Once you have created your code, export the project as a JAR file and upload or deploy it from the Dynamic Plugins tool accessible from the System tools menu.
For more information on each of these steps, please see the detailed instructions below.
1. Create the Eclipse project for your OSGi plugin
Use gradlew to create your eclipse project:
./gradlew eclipse
This command creates your eclipse project and downloads all required dependencies (i.e. jar files).
2. Import the project
Import the project created by the gradlew command into Eclipse. This ensures that the jar files are already configured and do not need to be added manually.
3. Edit the Debug Configurations
- In Eclipse, open the Java Project created with the
./gradleweclipse command. - Select Run -> Debug Configurations.
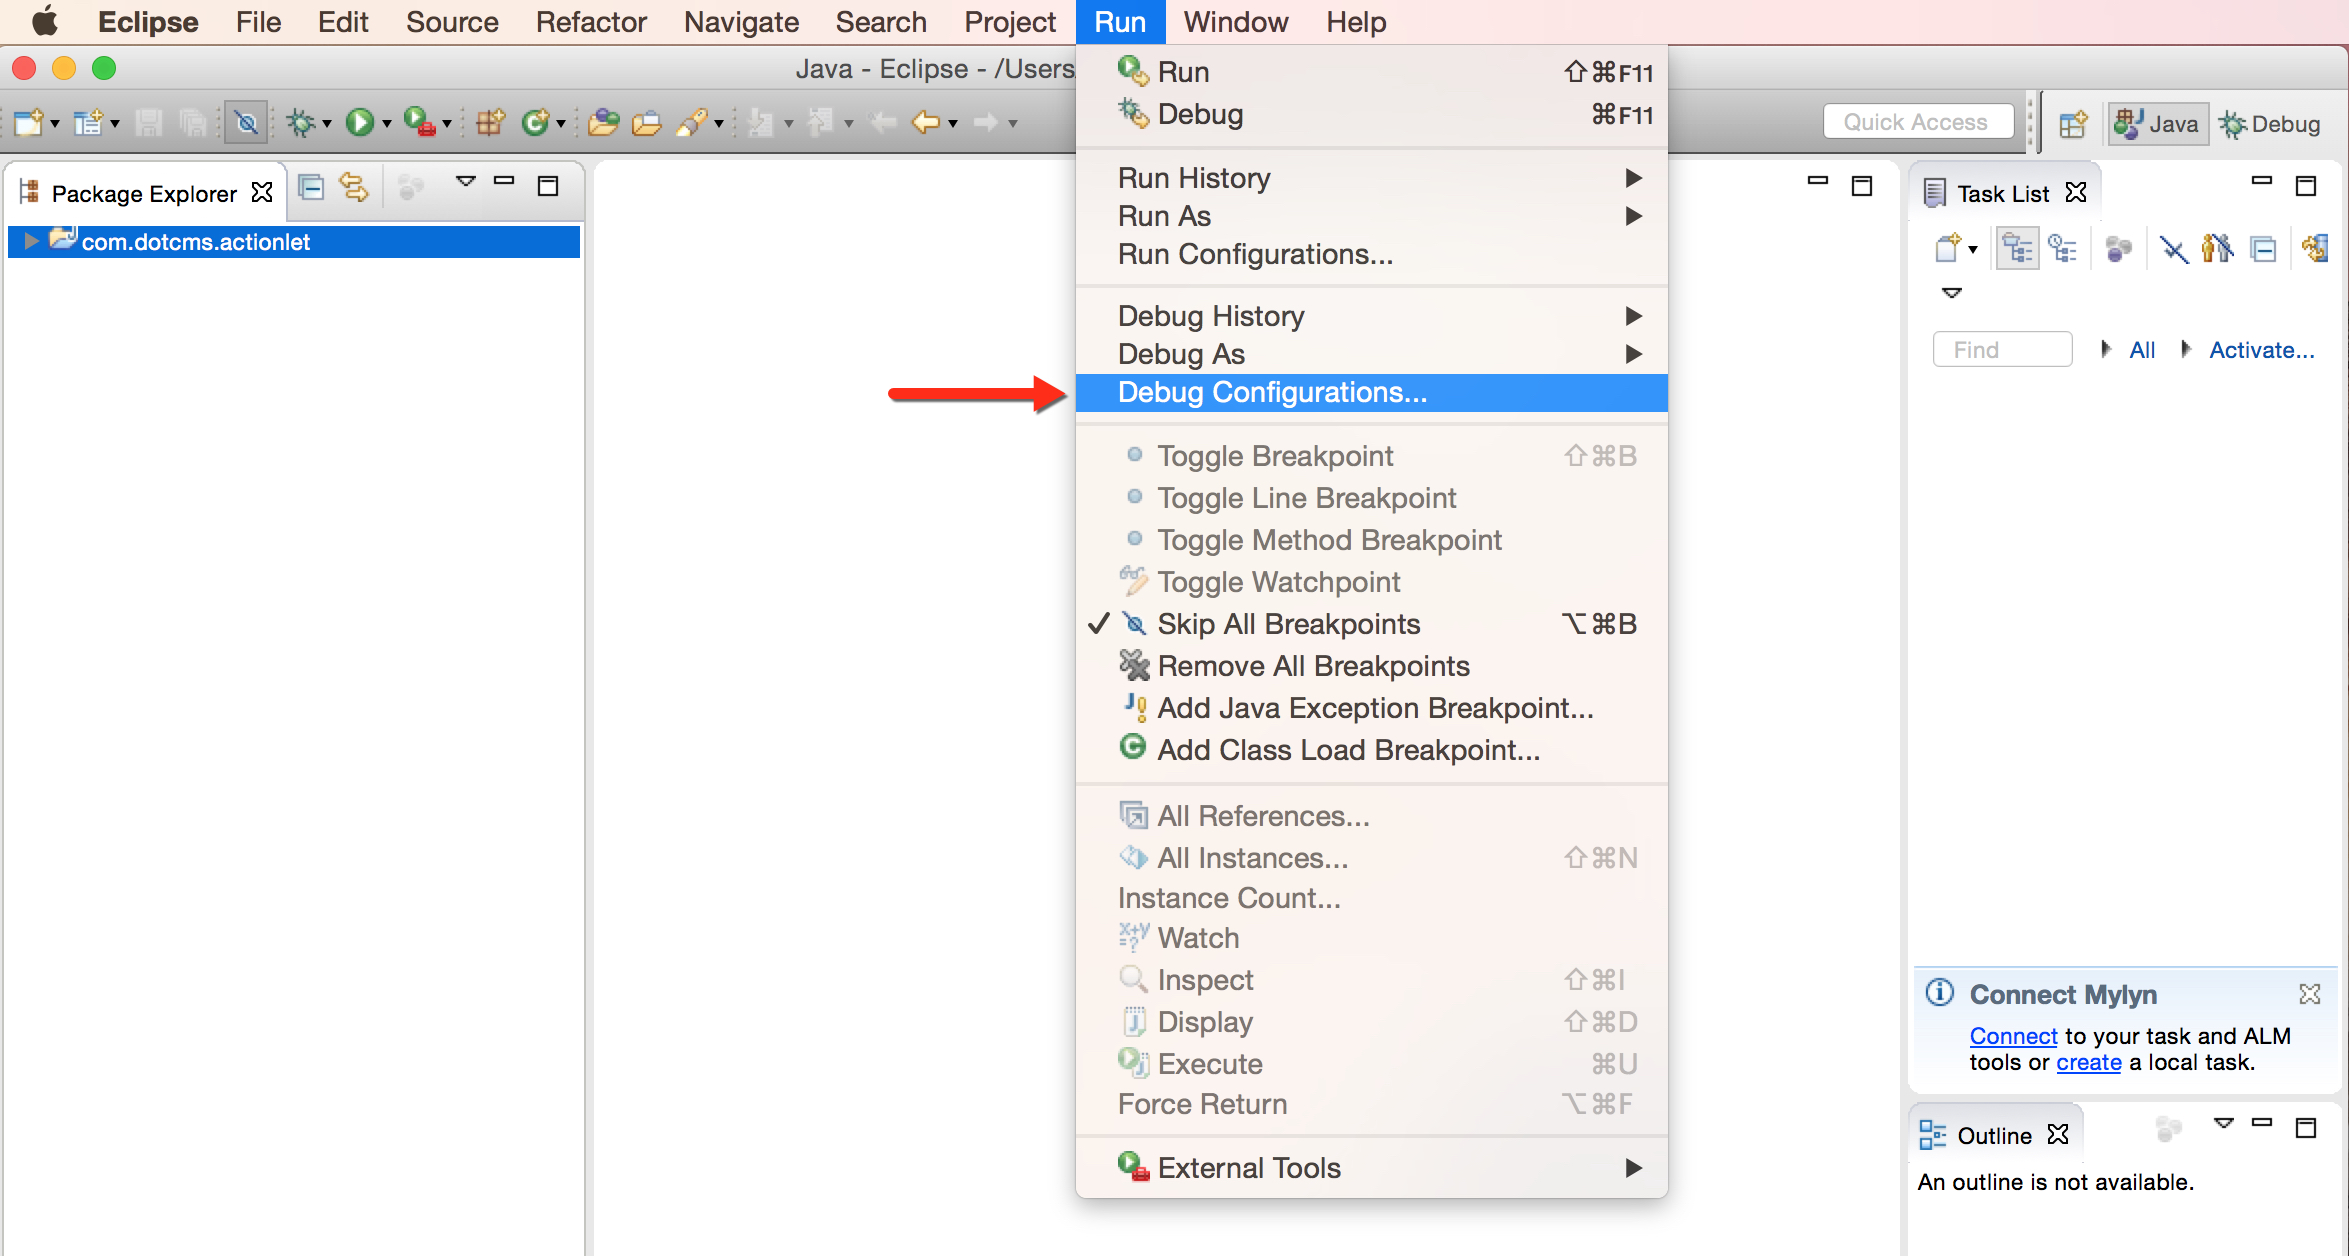
Double-click on Remote Java Application

4. Edit the Debug Settings
- Name the Debug Configuration.
- Make sure the Host and Port properties are set correctly.
- Click the Apply button.
- Click the Debug button.
5. Ensure the Debug threads are running
Check the Debug perspective in Eclipse, and make sure you can see the threads running in the Java Virtual Machine.
Create your plugin
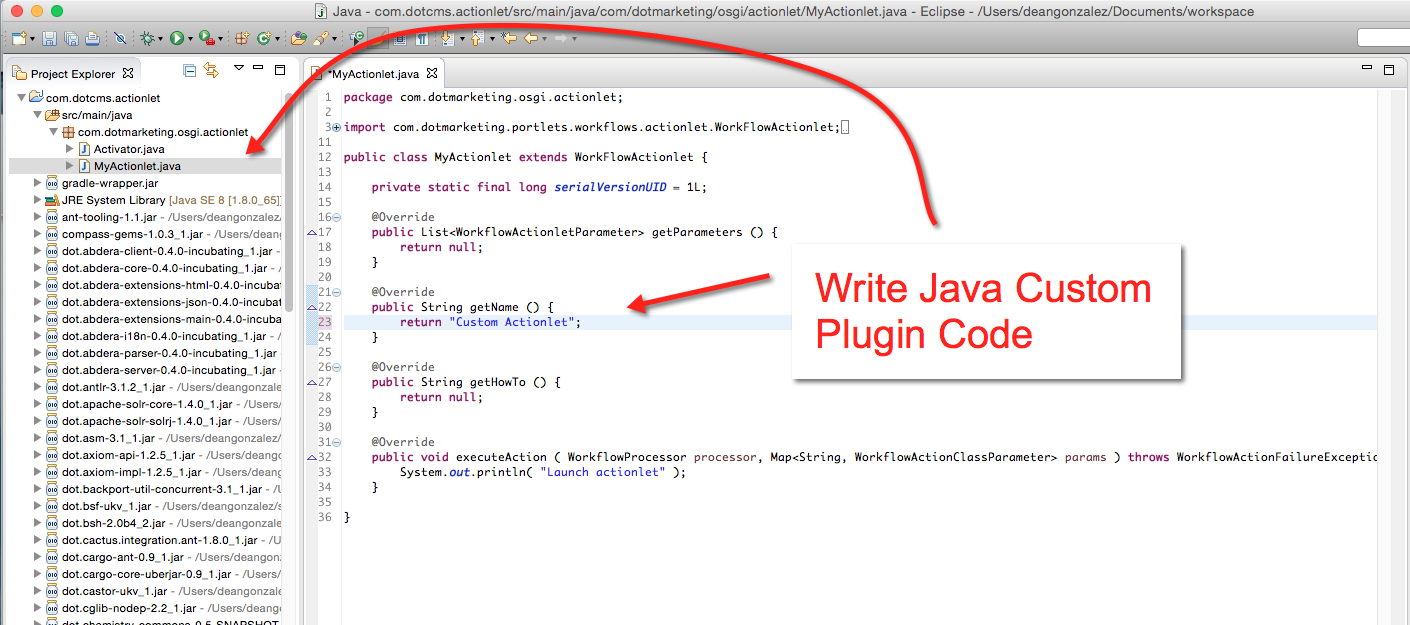
6. Add your custom Java code
- Open the Java files for your plugin in Eclipse.
- Add your custom Java code to extend dotCMS functionality via your OSGi plugin.
- Save your changes.
7. Package your plugin
- Open the command prompt.
- Change to your OSGi plugin directory.
- Run
gradlewto create your JAR file`./gradlew jar`- Note: If you cannot run gradlew, you may need to change permissions on gradlew (e.g.
chmod 777 gradlew) .
- Note: If you cannot run gradlew, you may need to change permissions on gradlew (e.g.
Install your plugin
8. Wait for downloads to complete
Allow a few minutes for the downloading of dependency files.
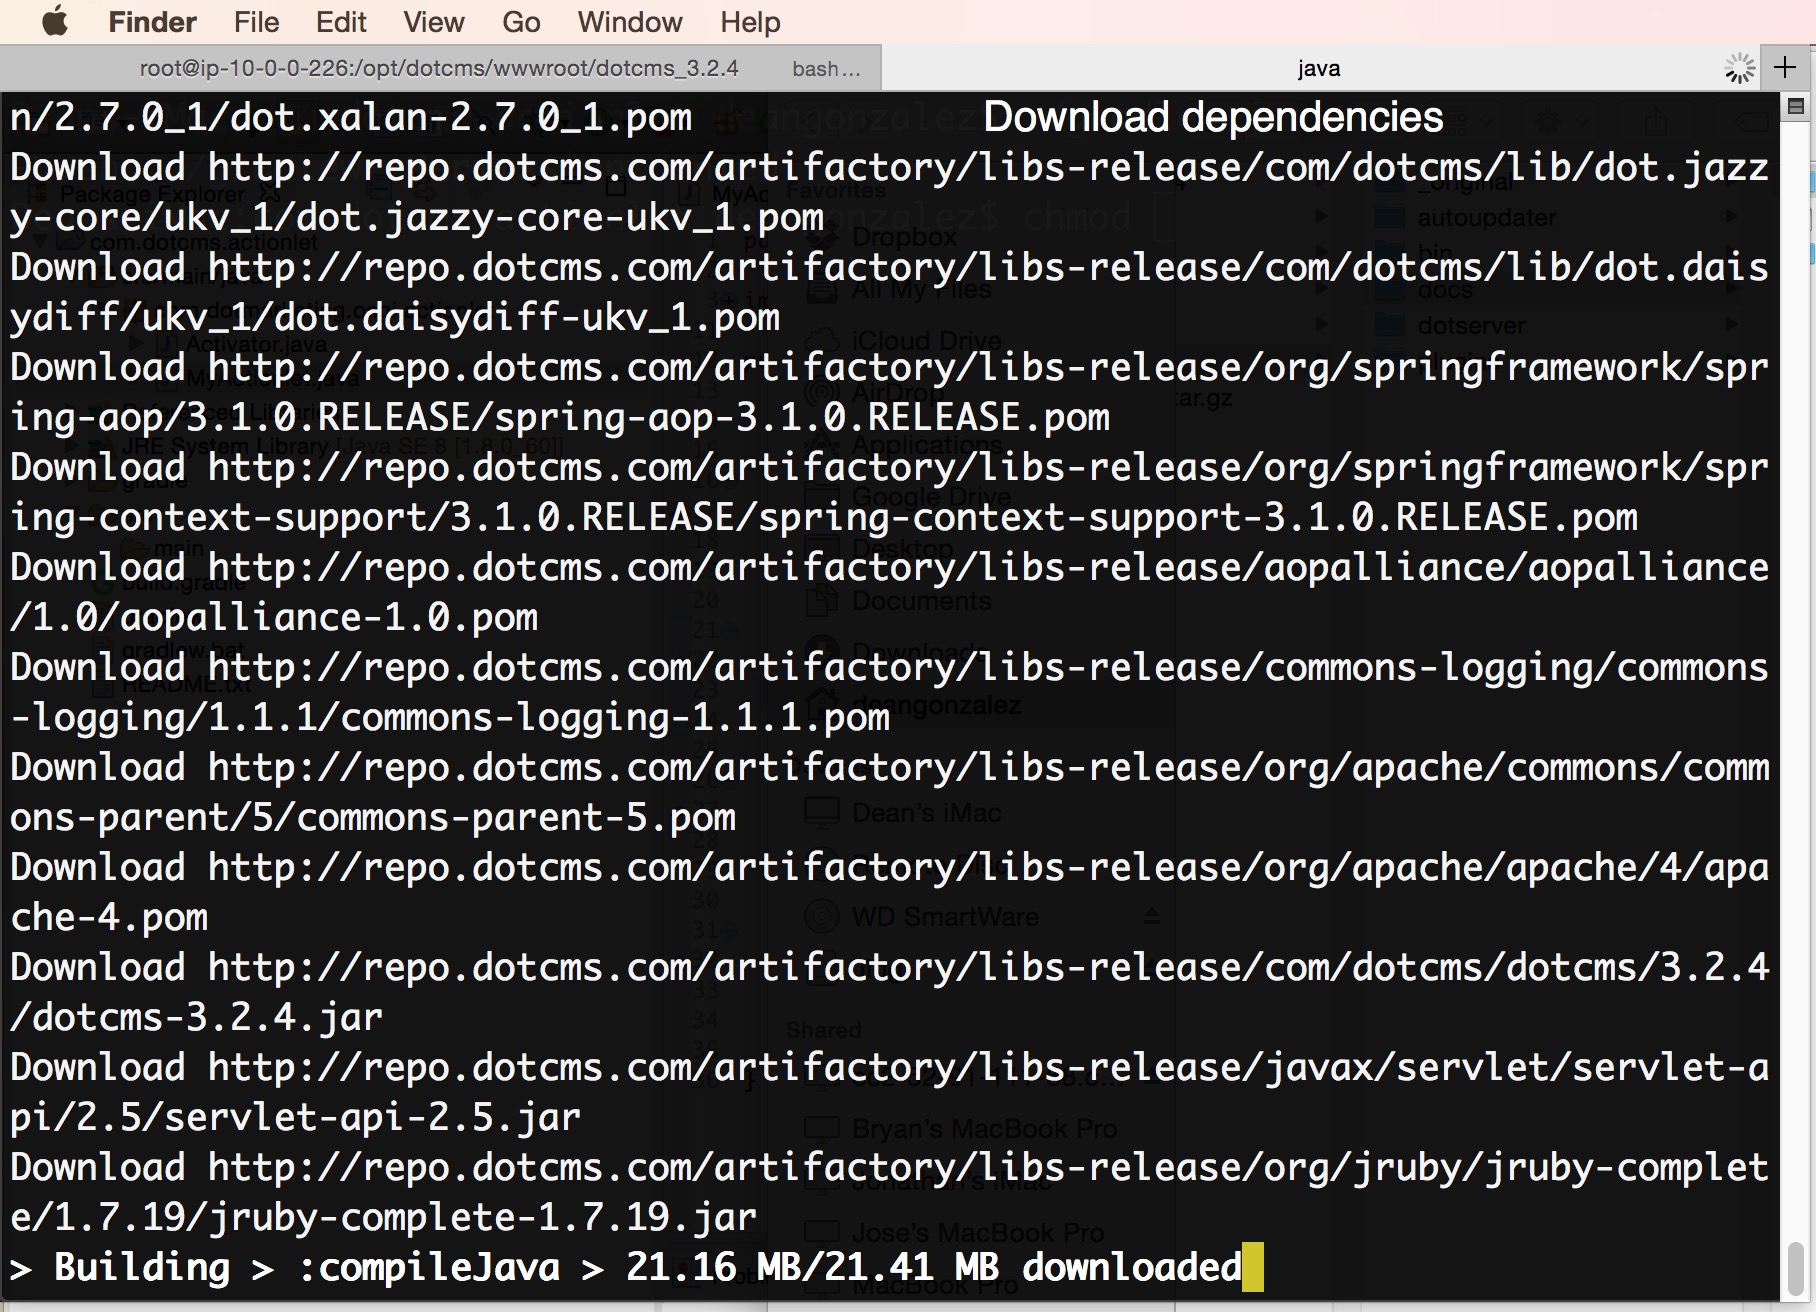
When the Build Successful message displays, the Build Folder and OSGi plugin JAR file have been created.

9. Upload your plugin
- Open the Dynamic Plugins tool.
- Click the Upload Plugin button.
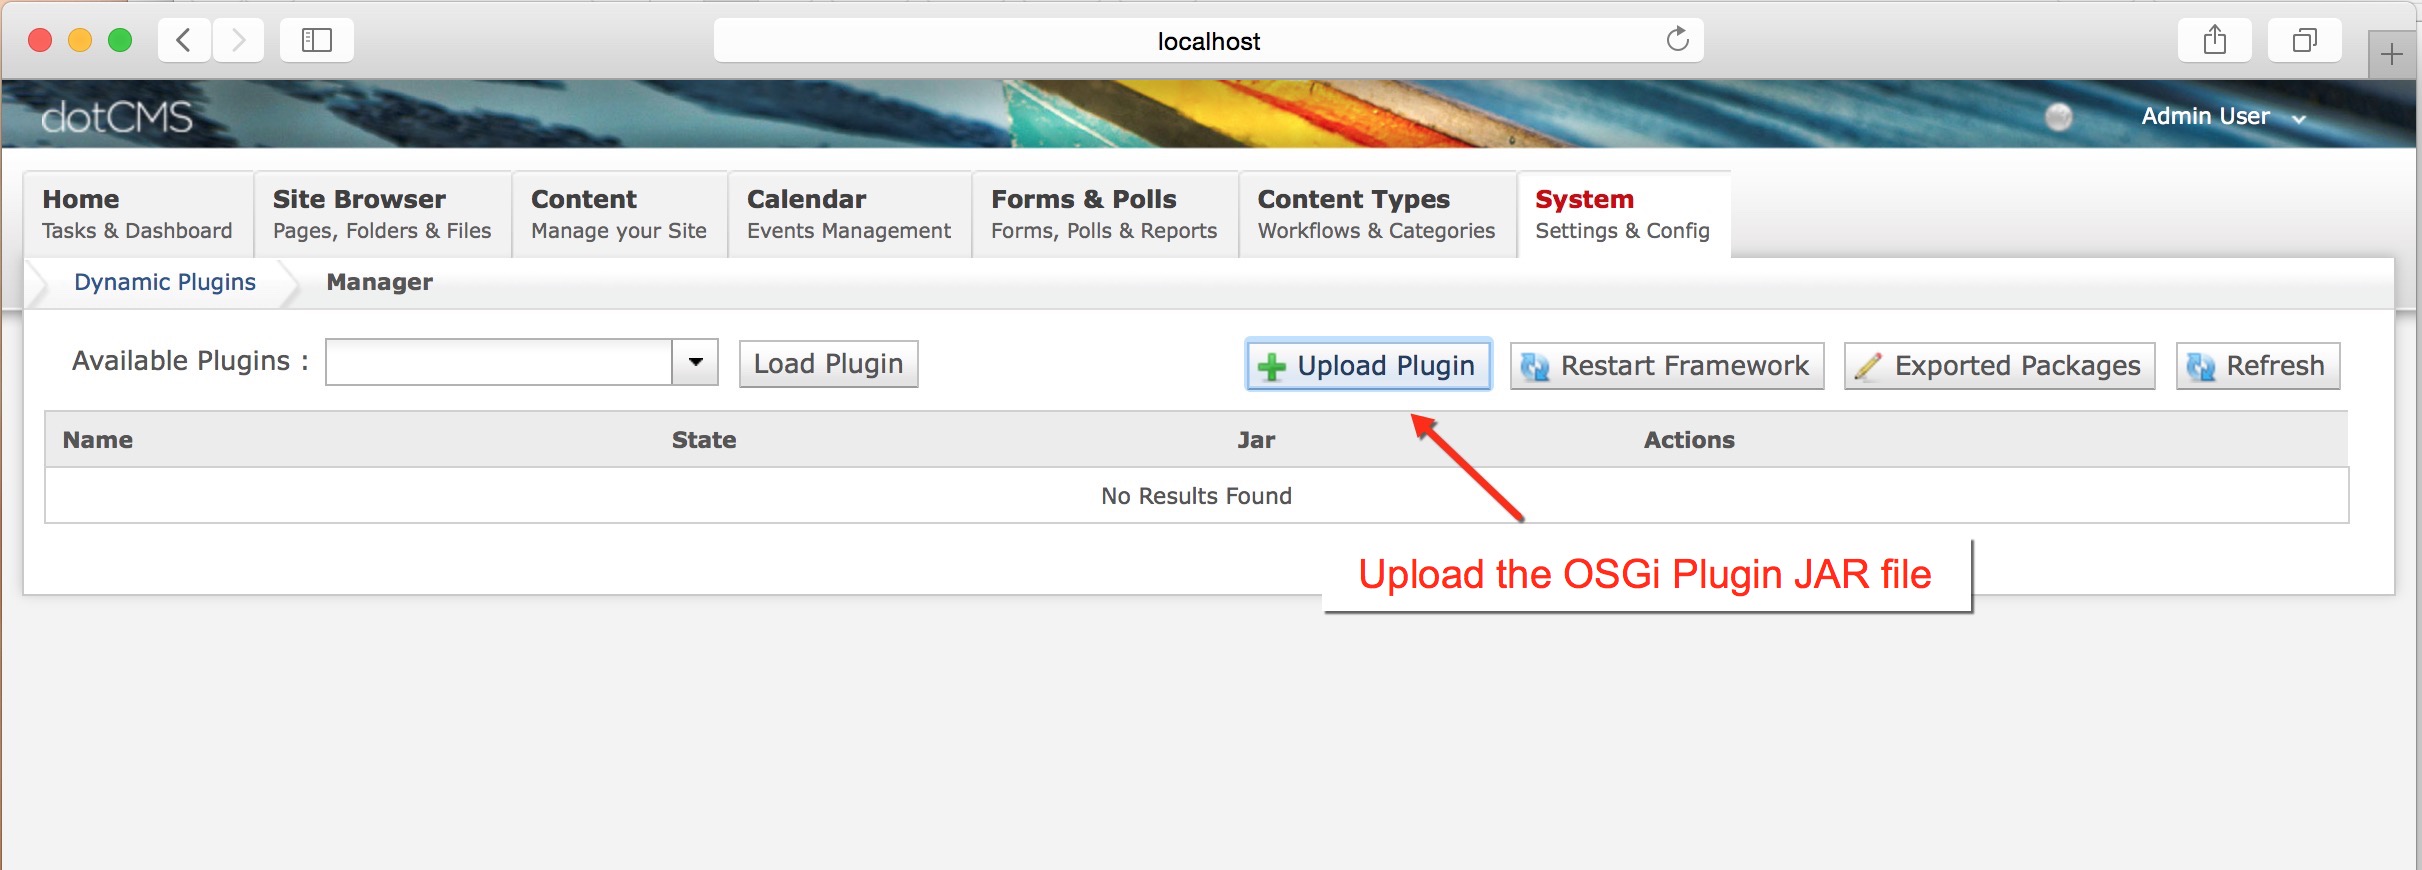
Choose the newly created JAR file inside the build directory of your OSGi plugin.

10. Test your plugin
Test the new functionality of your plugin to ensure that it works correctly. In the this example, the Name of the new Actionlet can be seen in the Workflow Actions list:

Uninstall Your Plugin
To uninstall your plugin bundle:
- Open the Dynamic Plugins portlet.
- Find your plugin and click the Stop Action link to the right of the plugin JAR file name.